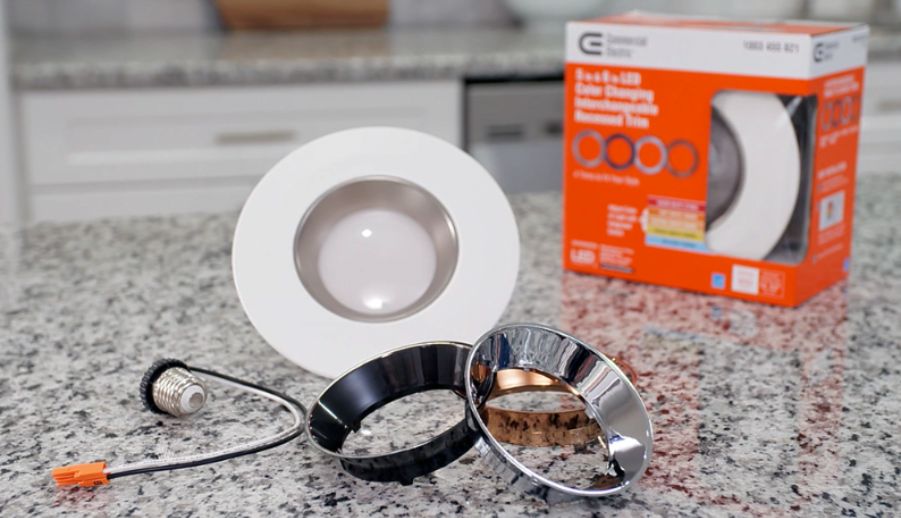
Upgrading your lighting doesn’t have to be a daunting task, especially when it comes to installing an LED retrofit kit.
This energy-efficient solution provides brighter and longer-lasting illumination while offering significant cost savings over time.
Explore what an LED retrofit kit is, why it’s a smart choice for your home or business, and the step-by-step installation process.
Essential tools and tips will help make your project seamless and safe.
Ready to transform your lighting? Let’s get started!
What Is An LED Retrofit Kit?
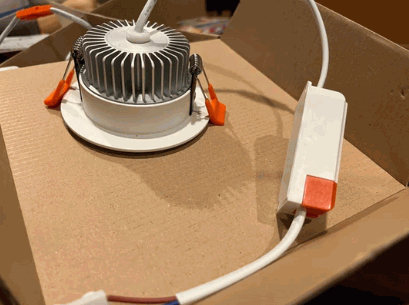
An LED Retrofit Kit is a modern lighting solution designed to upgrade existing lighting fixtures in homes and offices, enhancing energy efficiency and brightness while adhering to safety guidelines. This innovative kit typically includes components like a Recessed LED Retrofit Lighting system, which is compatible with various existing fixtures, and may utilize an E26 adapter or a TP24 connector to ease installation. By retrofitting current lighting setups, users can achieve a significant reduction in energy consumption, thereby contributing to both environmental sustainability and cost-effectiveness as we approach 2024.
Explore further: What Are The Advantages Of LED Lighting
Why Should You Consider Installing An LED Retrofit Kit?
Installing an LED Retrofit Kit can be a transformative decision for your home or office, presenting a multitude of benefits that include energy efficiency, cost savings, longevity, and versatility in design. As energy consumption continues to be a pressing concern for both residential and commercial spaces, opting for an LED Retrofit Kit not only reduces electricity bills but also promotes a sustainable living environment. The longevity of LED lights further ensures that maintenance costs are minimized over time, making this upgrade a worthwhile investment as we move into 2024.
Energy Efficiency
The energy efficiency of an LED Retrofit Kit significantly surpasses that of traditional lighting fixtures, making it an essential upgrade for reducing overall energy consumption.
This remarkable technology emerges from the need for sustainable and cost-effective lighting solutions. For instance, when examining a study conducted by the U.S. Department of Energy, it was found that switching to LED can lead to an estimated annual savings of $3 billion nationwide in energy costs.
- LEDs provide instant illumination, eliminating warm-up time associated with fluorescent bulbs.
- They also produce less heat, reducing the demand for air conditioning systems.
Many businesses have reported a significant decrease in maintenance costs due to the prolonged lifespan of LED lights. One retail chain noted a 50% drop in lighting maintenance expenses after their transition to LED, illustrating just how effective these upgrades can be in the real world.
Cost Savings
One of the most compelling reasons to install an LED Retrofit Kit is the potential for significant cost savings over time, as it reduces both energy expenses and maintenance costs. While the initial investment for an LED Retrofit may be higher than traditional bulbs, the long-term savings with reduced energy consumption and extended lifespan make it a financially savvy decision, particularly for businesses and homeowners looking to upgrade their lighting solutions.
By replacing outdated lighting systems with LED technology, users can realize reductions in their energy bills that compound year after year. For instance, consider a commercial space previously utilizing 400-watt metal halide fixtures. Transitioning to a 100-watt LED replacement could yield savings of up to 75% in energy costs. Over a 5-year period, if energy rates are around $0.12 per kWh and usage is consistent at about 12 hours daily, the overall savings could accumulate to:
- Annual Savings: $570
- Total Savings Over 5 Years: $2,850
This example illustrates how the initial outlay is offset significantly over time. Maintenance costs drop as LEDs can last 25,000 to 50,000 hours compared to 15,000 for traditional bulbs, which means fewer replacements and less labor needed.
Users must assess their unique usage patterns and local energy rates to estimate potential savings accurately.
Longevity
The longevity of LED Retrofit Kits is a key factor that enhances their appeal, outlasting traditional lighting fixtures by a substantial margin. While incandescent bulbs typically last around 1,000 hours, LED lights can operate for 15,000 hours or more, drastically reducing the frequency of replacements and associated labor costs. This remarkable lifespan not only contributes to lower maintenance efforts but also reflects the advancement in lighting technology as we look forward to 2024.
Considering maintenance and replacement costs, the shift to LED lighting becomes even more significant. Statistics suggest that switching to LED options can reduce lighting energy consumption by up to 75%, leading to substantial savings over time. For instance, in a commercial setting, a simple replacement of 100 incandescent bulbs with LED counterparts can lower annual energy expenses significantly.
- With LEDs, businesses can expect to spend about $1,500 on energy bills annually compared to $6,000 with traditional bulbs.
- The decreased frequency of replacements means less downtime and more consistent lighting performance.
As prices continue to decrease, the transition to LED isn’t just a sustainable choice; it’s a financially sound investment that businesses and homeowners alike should consider.
Versatility
Versatility is another significant advantage of installing an LED Retrofit Kit, as it allows homeowners and businesses to adapt their lighting solutions to meet varying design needs and preferences. These retrofit kits can seamlessly blend into a multitude of existing fixtures, providing options for different brightness levels, color temperatures, and styles, thus enhancing the aesthetic appeal of any space without the need for a complete overhaul.
This adaptability becomes particularly valuable in environments like home offices and living spaces, where both function and ambiance are essential. In offices, for instance, these kits can be configured to offer bright, cool white lighting for focused tasks, or warmer tones to create a relaxing environment during breaks.
- Energy-efficient designs
- Minimal maintenance requirements
- Variety of finishes
Unique features such as dimmability and smart control options allow users to customize their lighting experience. Whether modern, industrial, or classic styles are desired, LED Retrofit Kits can cater to all aesthetics, making them an ideal choice for anyone looking to upgrade their lighting without extensive renovations.
What Tools And Materials Do You Need?
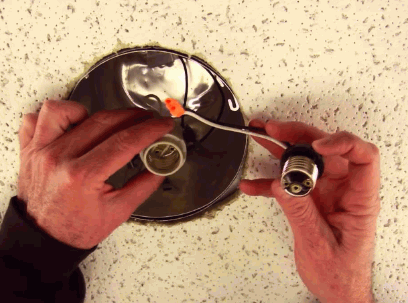
Before embarking on the installation of an LED Retrofit Kit, it is essential to gather the right tools and materials to ensure a smooth and efficient upgrade process. Common tools required include a screwdriver for disassembling existing fixtures, wire cutters for trimming excess wiring, wire nuts for secure connections, and electrical tape to ensure safety and insulation during installation. With these tools at hand, the installation can be completed safely and effectively, creating an energy-efficient lighting solution for your home or office.
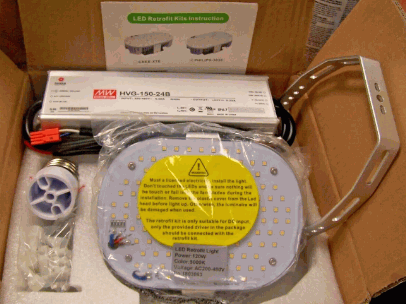
LED Retrofit Kit
The LED Retrofit Kit itself is the cornerstone of the installation process, containing the essential components necessary for upgrading your existing lighting fixtures to energy-efficient LED technology. Typically, the kit includes LED bulbs, adapters such as E26 or TP24 connectors, and any necessary hardware for mounting, ensuring a comprehensive solution for your lighting needs.
Each part of the kit plays a vital role in enhancing your lighting system. The LED bulbs themselves are designed to emit superior illumination while consuming significantly less energy compared to traditional options. The adapters are crucial, as they facilitate compatibility with various fixture types, ensuring a seamless installation experience.
Beyond these, the
- mounting hardware,
- wiring components,
- and instructional guides
also contribute substantially. These components not only expedite the installation process but also enhance safety and reliability, preventing future malfunctions and extending the lifespan of your lighting system.
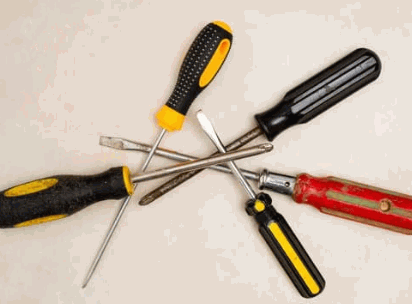
Screwdriver
A screwdriver is an essential tool for any electrical installation, particularly when working with an LED Retrofit Kit, as it is used to remove screws securing the existing lighting fixtures. Depending on the type of screws used in your fixtures, a flathead or Phillips screwdriver may be required to ensure a secure fit during both removal and installation.
Having the right screwdriver not only facilitates a smoother installation process but also significantly reduces the risk of damaging the fixtures or surrounding structures.
For instance, a Phillips screwdriver is commonly used for most modern light fixtures, providing the necessary torque to handle tougher screws. In contrast, a flathead screwdriver can be crucial when dealing with older installations where slotted screws may be present.
Likewise, the use of a
- Torx screwdriver
- Magic screwdriver
can make a considerable difference in unique situations, especially with specific security screws designed to deter tampering.
Having these tools readily available ensures that improvements in home lighting systems proceed without unnecessary complications or interruptions, allowing for a more efficient upgrade to energy-saving solutions.
Wire Cutters
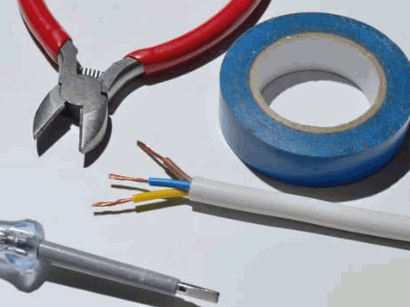
Wire cutters are a crucial tool when installing an LED Retrofit Kit, as they allow you to trim and prepare wires for secure connections during the upgrade process.
In this context, precision becomes paramount; even a slight miscalculation in the length of a wire can lead to poor connections, which may ultimately compromise the integrity of the entire lighting system. When utilizing wire cutters, it’s important to follow a careful process that includes measuring and marking wires before cutting.
This attention to detail not only enhances electrical safety but also plays a significant role in maximizing the efficiency of the retrofit.
Here are some essential tips:
- Always use wire cutters that are specifically designed for electrical work to ensure clean cuts.
- Inspect wires for any signs of damage before proceeding with installation.
- Use additional tools, such as wire strippers, to prepare the ends of the wires to promote better connections.
By adhering to these best practices, one can effectively manage the nuances of electrical wiring and ensure a successful LED retrofit installation.
Wire Nuts
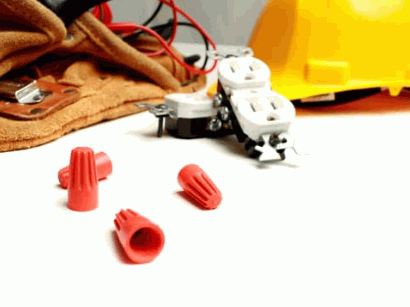
Wire nuts play a pivotal role in the installation of an LED Retrofit Kit, serving as connectors that securely join multiple electrical wires together. These small but essential components ensure that electrical connections are safe and reliable, preventing potential hazards and ensuring efficient operation of the lighting fixtures.
During the installation process, it is crucial to understand how these wire connectors function to avoid misunderstandings and ensure safety.
Generally, wire nuts work by twisting together the exposed ends of electrical wires and then placing the nut over them, which holds the wires firmly in place. This action creates a tight, insulated connection that minimizes the risk of short circuits and electrical fires.
Proper use of wire nuts not only enhances the safety of the installation but also maintains the performance and longevity of the LED lights. If a technician is installing a new lighting system, they must carefully select the appropriate size and type of wire nut based on the gauge of the wires being connected.
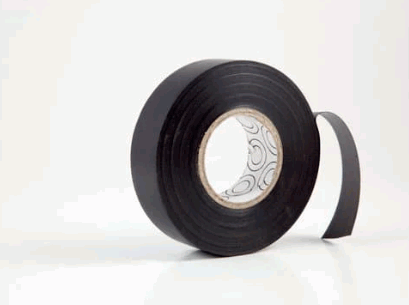
Electrical Tape
Electrical tape is an important safety component in the installation of an LED Retrofit Kit, as it provides insulation for exposed wire connections, helping to prevent electrical shorts and hazards. By wrapping electrical tape around wire connections, installers can add an extra layer of security, ensuring that the retrofit lighting is safe and compliant with safety guidelines.
Along with providing insulation, this versatile tape is instrumental in a variety of other functions during the installation process. It can be used to:
- Secure connections: Electrical tape can help keep wiring connections tight and secure, reducing the risk of disconnections over time.
- Color code wires: By using different colors of electrical tape, installers can easily identify circuits and wires, facilitating troubleshooting and maintenance.
- Protect against moisture: Wrapping electrical tape around connections can shield them from moisture, preventing corrosion that can diminish performance long-term.
Electrical tape not only enhances safety measures during the installation of LED Retrofit Kits but also demonstrates compliance with electrical standards, reinforcing the importance of meticulous installation practices.
Step-By-Step Guide To Installing An LED Retrofit Kit
Installing an LED Retrofit Kit is a straightforward process that can enhance the brightness and efficiency of your existing lighting fixtures while reducing energy consumption. This step-by-step guide will walk you through the necessary actions to safely install and upgrade your lighting system, ensuring that you achieve the best possible results and comply with safety guidelines. Whether you’re upgrading your home or office lighting, following these steps will help you maximize the benefits of your new LED technology.
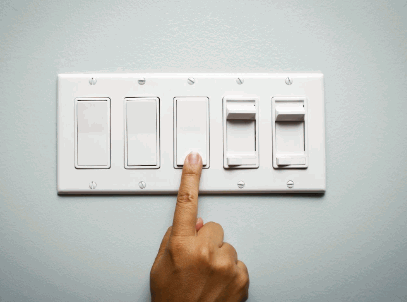
Step 1: Turn Off The Power
The first and most critical step in installing your LED Retrofit Kit is to turn off the power to the existing lighting fixtures, ensuring safety throughout the installation process. By switching off the circuit breaker or removing the fuse, you can prevent electrical shocks and create a safer working environment while upgrading your lighting system.
To completely confirm that the power is off, one can use a voltage tester or multimeter. Simply follow these steps:
- First, ensure all light switches are in the off position.
- Next, check for any visible signs of voltage by using your voltage tester on the fixture.
- If the tester indicates there is no voltage, you can proceed with confidence, knowing the circuit is de-energized.
This careful approach not only enhances safety but also promotes effective installation, allowing your LED Retrofit Kit to function optimally while minimizing potential hazards.
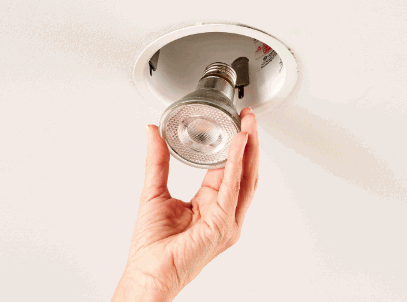
Step 2: Remove The Existing Bulb
After ensuring that the power is off, the next step is to carefully remove the existing bulb from the lighting fixture to prepare for the installation of your LED Retrofit Kit. Gently unscrewing or pulling out the bulb, depending on the fixture type, will allow you to access the fixture’s internal components for further modifications.
When handling different types of bulbs, it’s essential to identify their specific characteristics and removal instructions. Below are some guidelines to ensure a safe and smooth process:
- Incandescent Bulbs: These are generally straightforward to remove. Simply grasp the bulb, twist it counterclockwise, and pull gently. Be cautious of glass shards if the bulb is broken.
- Fluorescent Bulbs: With these, you may need to rotate them until they are released from their sockets. Always wear gloves to protect against sharp ends.
- LED Bulbs: Modern LED bulbs often resemble traditional bulbs but may have different connectors. Grip the base, turn anti-clockwise, and remove carefully.
While removing any bulb, always ensure your hands are dry, and consider using a towel in case of any unexpected breakage. This will not only enhance safety but also make the task less tedious.
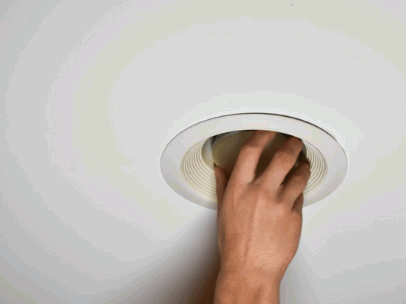
Step 3: Remove The Existing Light Fixture
Once the existing bulb is removed, the next step is to detach the existing light fixture from the ceiling or wall to facilitate the installation of your LED Retrofit Kit. Depending on the fixture design, this may involve unscrewing mounting screws or unclipping it from the bracket for a smooth removal process.
There are several methods to effectively remove various types of light fixtures, and understanding these can be crucial for a safe and efficient transition. For instance, while some fixtures may simply pivot down off their bases, others could require a more thorough approach. Here’s a brief overview of common fixture types:
- Flush Mount Fixtures: These are generally attached via screws. Be sure to turn off the power and use a voltage tester to confirm safety.
- Pendant Lights: Often suspended by chains or rods, they usually need to be unscrewed from the mounting bracket. Make sure the ceiling is stable enough to handle the weight when detaching.
- Chandeliers: These elaborate fixtures may have multiple screws or a cage-holding light bulbs. It’s essential to carefully support them as you work to avoid any dropping hazards.
Throughout the removal process, taking precautions such as wearing safety glasses and using insulated tools will help prevent accidents.
Step 4: Connect The Wires
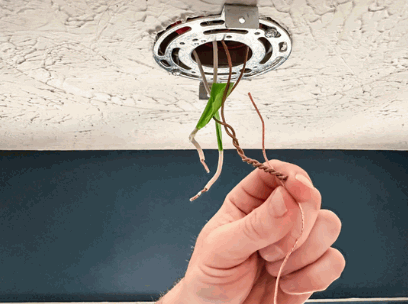
Connecting the wires is a crucial step in the installation of your LED Retrofit Kit, as it ensures that the lighting fixtures operate effectively and safely. Carefully match the wiring colors, typically black to black (live), white to white (neutral), and green or bare wire to the grounding wire, while securely twisting the wires together and using wire nuts to finish the connection.
When undertaking this process, it’s essential to first ensure that the power is turned off at the circuit breaker to prevent any risk of electric shock. Begin by stripping the ends of each wire to expose a suitable length of copper for connecting.
After making the connection, always double-check that there are no frayed wires or loose connections, as these could lead to electrical fires.
- To further enhance safety, wrap electrical tape around each connection.
- It is advisable to have a voltage tester handy to confirm that no current is present before starting work.
Following the prescribed color codes allows for a standardized approach, minimizing the chances of incorrect wiring that could ultimately damage your fixture or create dangerous conditions.
Step 5: Secure The LED Retrofit Kit
After connecting the wires, the next step is to secure the LED Retrofit Kit to the existing fixture mounting or the ceiling/wall, ensuring it is firmly in place for optimal performance. This may involve tightening screws or clips, depending on the specific design of the retrofit kit and the original fixture.
Making sure the kit is securely attached is crucial not only for safety but also for the longevity of the lighting system. If the retrofit kit is not stable, it may lead to flickering lights or even damage to the electrical components over time.
- Begin by identifying all possible mounting points.
- Utilize the appropriate screws or fasteners provided in the kit.
- Double-check that each screw is tightened adequately without over-tightening, which could cause damage.
Remember, a well-secured retrofit kit contributes significantly to the overall efficiency and reliability of your lighting setup. Taking these precautions will help ensure a successful installation and a satisfying lighting experience.
Step 6: Turn On The Power And Test The Light
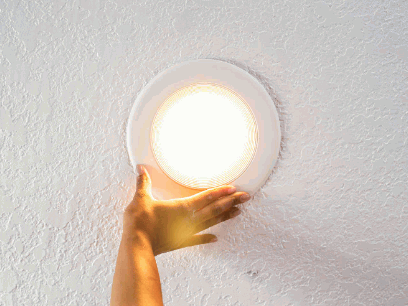
The final step in the installation process is to turn the power back on and test your newly installed LED Retrofit Kit, confirming that it functions correctly and meets your lighting needs. Once the circuit breaker is reset, observe the brightness and performance of the lights, ensuring they illuminate as expected without flickering or issues.
After powering up the system, take a moment to closely examine the overall functionality of the kit. Look for any inconsistencies in the lighting intensity, and listen for unusual sounds that could indicate an underlying problem. It’s crucial to perform a systematic check to rule out any potential wiring or installation flaws that may arise. If any issues do occur, consider the following troubleshooting tips:
- Check all connections to ensure they are secure.
- Inspect the circuit for any blown fuses or tripped breakers.
- Test the voltage at the fixture to confirm it’s within specified limits.
By following these steps, one can ensure a seamless integration of the new lighting system, setting the stage for a brighter, more efficient space.
Tips And Precautions For Installing An LED Retrofit Kit
When installing an LED Retrofit Kit, it’s essential to follow specific tips and precautions to ensure a safe and efficient upgrade process, maximizing the benefits of your new lighting solution. Safety should always be the top priority, so wearing protective gear, ensuring power is off, and verifying compatibility with existing fixtures are crucial steps to prevent accidents and achieve optimal results. By adhering to these precautions, you can enjoy the advantages of energy-efficient lighting while maintaining a safe installation environment.

